Monday, November 27, 2017

Volunteered Geographic Information (VGI)

Introduction:

In the world of data, data collection is expensive and tedious but necessary to give maps the life and power that they have.  WebGIS has opened the doors for new opportunities for data collection, the internet allows map and data developers to have immediate access to the public.  The public can then be used to collect data! In the world of GIS this is called Volunteer Geographic Information (VGI).  Other areas of the internet have been using this technique (crowd sourcing) to compile lots of information.  The most well known website that does this is Wikipedia.  Wikipedia is open to the public to add information and contains almost every topic one can imagine.  The field of GIS is now using this technique to collect all sorts of information.

In this lab a VGI app will be created that collects information about a cities infrastructure.  Information about broken sidewalks, healthiness of vegetation in green space and the color of fire hydrants will be collected using VGI.


Methods:


To begin creating a VGI application, a feature service needed to be created with empty features for the point class Fire Hydrant, line class for Sidewalks, and a polygon class for Green Spaces.  Domains were set for these features and they were given proper symbology.  These features were saved in a map in the live server and then published to that same server.  This allows the features to be accessed by people who are using the application.

Once the features are all set and published, the next step is coding the web application. 

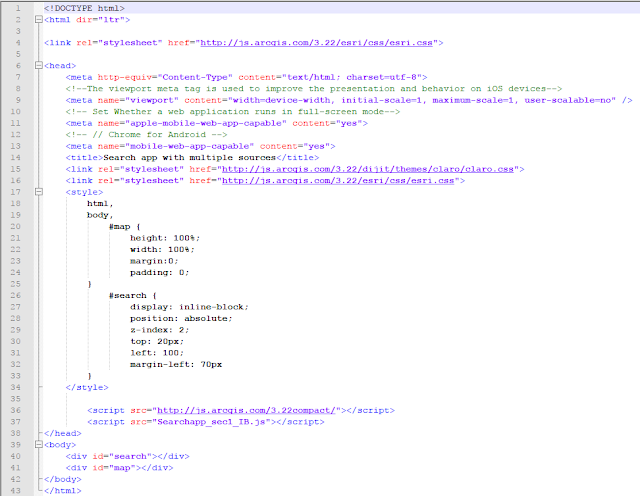
This first section of code is an html page that sets up the user interface for the application.  It is important to have a user interface that is friendly to people who are not familiar with GIS.  This html page calls in external CSS style sheets that create the borders and styling of the application.  The html page then calls in the javascript that creates the map and calls in the features.


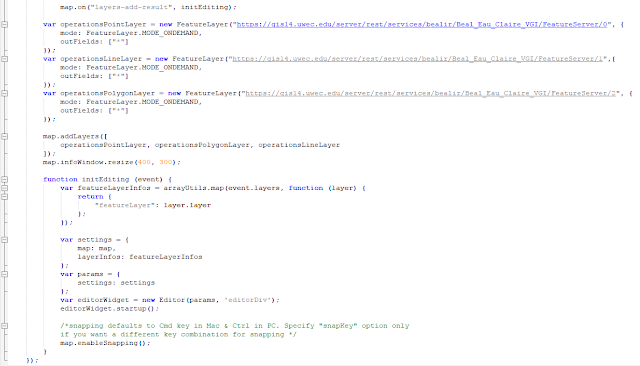
The image below shows the first part of the java script file that creates the map and calls in the features as feature services that were created in the first part of the lab.


The image below is a second screenshot of the js. file.  At the top of the page, the three feature services are called in as variables in the map.


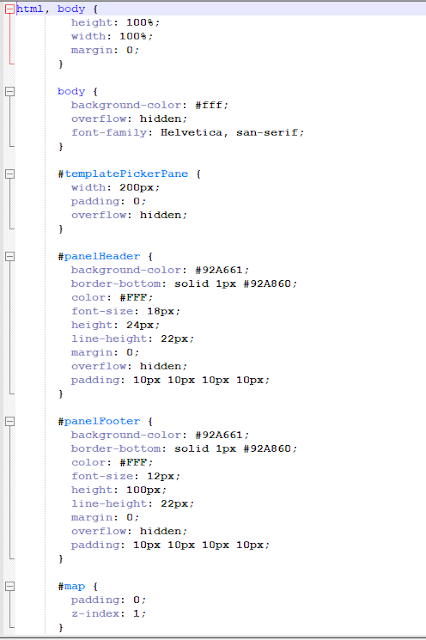
The last two images are a CSS page that sets the styling for the application.  In this code, widths and heights are given to different sections of the code. This gives the page a user friendly layout that is easy to understand.


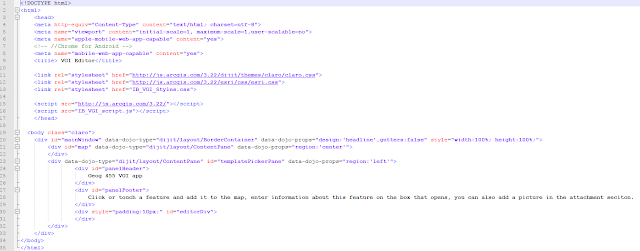
The next section of the lab modifies the code so that the application is more user friendly towards mobile platforms. The code from the above pages was copied and added to new files.  A new page was also added in this section.  The html page was changed to make it more mobile compatible, and call in the toggle javascript page. 


The image below is the toggle page that was created just for this section.  The toggle page creates two variables for a map zoom slider and a toggle page.  It then uses an if statement to check if the size of the platform viewing the application is a certain size, and if it is, changes the size of the page. 


The only changes to the javascript file in the second part of this lab was to change http to https when referencing the services on a secure server. 


The css code was changed to reflect the toggle variable page that was added. A background image was also added to give the page some more life. Styling was given to the template picker that is used to turn the template picker on and off. 


Results:

The resulting webpage created from this code is a simple webmap that is not distracting to the user with the feature toolbar on the left for user to select an element and add it to the map.  The toggler on the top right of the page can be used to hide the toolbar on the left. 


When the user clicks an element to add it, then clicks on the map, a pop up window comes up and prompts the user to enter attribute information. 


VGI applications are very useful to collect information out in the world.  People that live in an area are most likely much more familiar with the place then people who would just be surveying it.  They can provide accurate information at no cost to the data producer.  In the case of the application that was created in this lab, the people providing the information have self interest in the data so they will provide quality data.  If they want their city to be fixed, they will provide accurate information.

Sources:

Ian Beal
ESRI
Dr. Cyril Wilson
Wednesday, November 15, 2017

ArcGIS API for JavaScript 2: Mobile responsive apps

Introduction:

With today's current level of technology, it is important that web mapping applications function just as well on a mobile device as they do on a computer.  This lab was designed to teach students how to optimize web mapping applications for different platforms.  In this lab, a query application was created that allows the user to search different features on the map.

Methods:

The first section of this lab was creating a web application that allows users to search for a location, congressional district, or a congressman via search bar located in the top of the map.  This was done by formatting an HTML file and connecting it to a JavaScript file that contained the code that allows the application to function.  Within the HTML page a viewport <meta> tags is used to make the page more responsive to iOS devices.  Meta tags are also added to make the page more responsive to chrome and android devices.

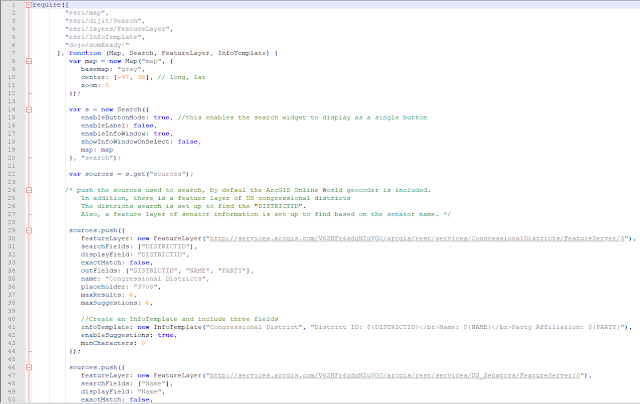
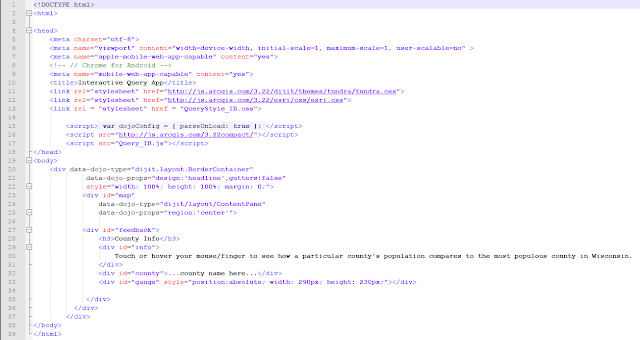
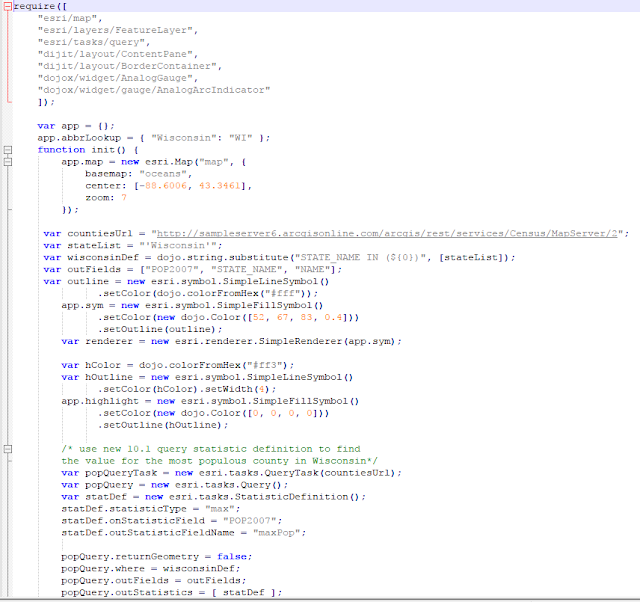
The following two images are the JavaScript files that create and give life to the query map application.  Modules are imported and parameters are accessed.  Within the JavaScript file, feature classes are imported as services and pop-ups are set.  The pop ups are coded to show certain fields from the features.  This is also where the search bar is created and put on the map.


The second part of this lab was to publish a service containing Universities around the United States and to connect this service to the web application and format it to search universities as well as the popup. This HTML page is similar to the one in the first part of the lab, it uses meta tags to make the application mobile responsive to different platforms.


The JavaScript for this application is similar to the first section but includes the universities as a service and the pop up is configured for the universities.


The last part of this lab was to configure a query application that compares the populations of counties in Wisconsin.  This application was configured to show a chart in the bottom left corner of the page that compares the county the user clicks on to the county with the highest population in Wisconsin.  This page is also set up to be responsive on all mobile platforms.


Within the JavaScript file of this page, modules are imported, parameters are set, the map is initialized, the gauge is created and the functionality of the gauge is set up.  The query is also set up for the county population that gives the gauge life.


Finally the CSS is created that gives the map layout life and formats the gauge in the bottom right section of the page.  The CSS also highlights the county in yellow that the user is hovering over.


Results:

This is the first lab that more function was given to the Web Applications created.  The search function created in the first part of the lab is a simple addition that shows up in most web mapping applications.  The search function is an easy way for users to easily find a place they are familiar with from there navigate to somewhere else.  Besides just finding locations with the search function, the search function allows users to search for things like a congressman, school , or congressional district, this is a very easy way for a person using the application to navigate a large amount of data.  The sky is the limit when formatting what can be searched for in the search bar, it simply needs to be added into the code.  The query application that was created is the most powerful thing that has been created in this class so far.  It takes data and manipulates it so the user just see's the result and not a clutter of data.  This only shows the user one aspect of data, in this case, percent population in relation to the most populous county in Wisconsin.  It is displayed using a gauge on the bottom of the page and allows no room for the user to be confused about what the application does. 

Tuesday, November 7, 2017

ArcGIS API for JavaScript 1

Goal and Background:

When creating a web mapping application, versions of the WebApp builder have been used up to this point.  This lab introduces the ArcGIS API for JavaScript 1.  This allows the user to create a web app from scratch.  This takes a certain amount of HTML and JavaScript coding skills.  The API allows the user to use many tools that ESRI provides, by calling them in their code.  This allows the user to have a large amount of control on what their application looks like and how it performs.  This is very useful in many situations where the WebApp builder limits the developer.  In this lab three different web applications will be created to show the capabilities of using ArcGIS API for Javascript to create web mapping applications.


Methods:

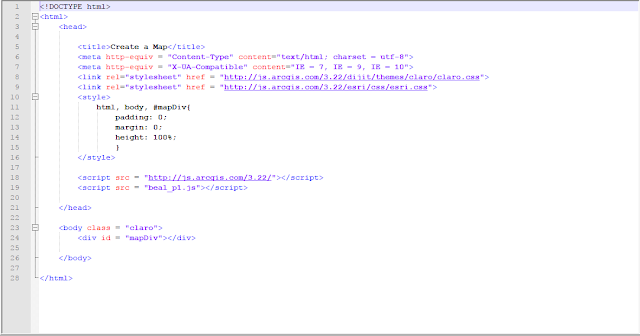
The first section of this lab was to write code that referenced esri and dojo's css style documents and to bring in a web map.  This first image is the HTML page that does this.  It also references the JavaScript file that opens the webmap.

This is the JavaScript file that is referenced in the HTML page above.  It simply calls in the map from the dojo library as a function and then declares the center, zoom and basemap.


Part 2
The second part of this lab was to build an online map with a functioning service built in.  This was done by creating a similar HTML page as the one above and calling in a more complex JS (Javascript) file.  This HTML page is almost the same as the one above but with a few slight differences.  This one uses a small amount of CSS within it to create a border, and set the height and width. The next difference in within the script tag.  This HTML page declares the dojoConfig variable and sets a few parameters for when the webmap is loaded.


The following image is the JS file that is referenced in the HTML page above.  This code pulls in a map from the Dojo library, sets parameters then brings in an ESRI sample service and inserts it into the webmap.


Part 3 of this lab was more complex than the first two.  This section of the lab was to create a routing application from scratch.  This was done in a similar was as the previous two examples except with different javascript for the functionality.  The HTML page is a simple page that sets the parameters then calls in the JS file.  This one has a short paragraph that shows up beneath the map to give the user some instruction on what the map does.


This JS file uses ESRI and Dojo libraries to call in the map and then use the ESRI routing service.


Results:


This first map is the simple map from part one.  The task was simply to call in a webmap.


This next map is from part two of the lab.  A simple wemap was pulled into the application and a feature service hosted by ESRI was placed on top of that webmap.  This is a very useful function that will be the basis of most web mapping applications.  The ability to have data on a map is what makes maps so powerful.


This last map is the routing application that was created.  This is a powerful yet simple application that was easily created.  The user simply has to click two points and a route is created.  This is a very simple application that can be expanded on and turned into a full out interactive routing application.  


Sources:

Cyril Wilson